


07 Nov DIY Faux Metal Painted Pumpkins for Fall Industrial Decor
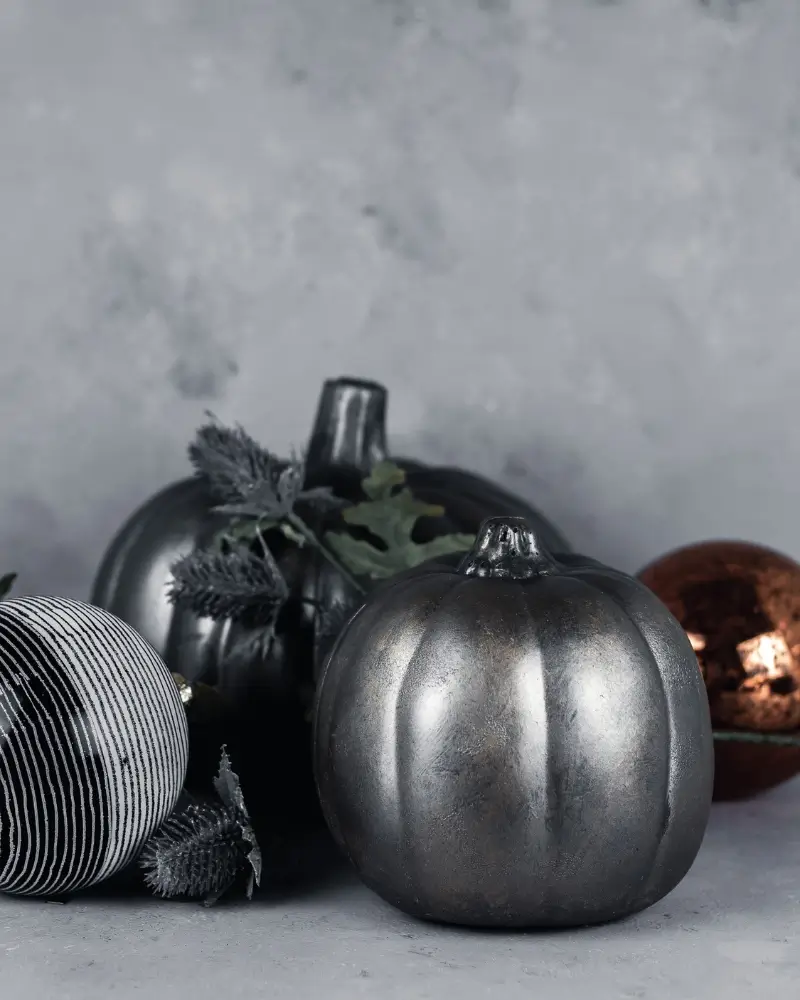
This year I added DIY faux metal painted pumpkins to our fall industrial decor for more variety in our pumpkin patch concept. Wait, is faux metal even a thing?
“hey google, what is faux metal?”
Google results show me that there is an actual paint called ‘faux metal’, but I’m talking about making something that is not metal look metal with inexpensive materials you can find at home. Okay, let me rephrase that – inexpensive materials that you will most likely find in the home of a geeky cosplayer.
Semantics.
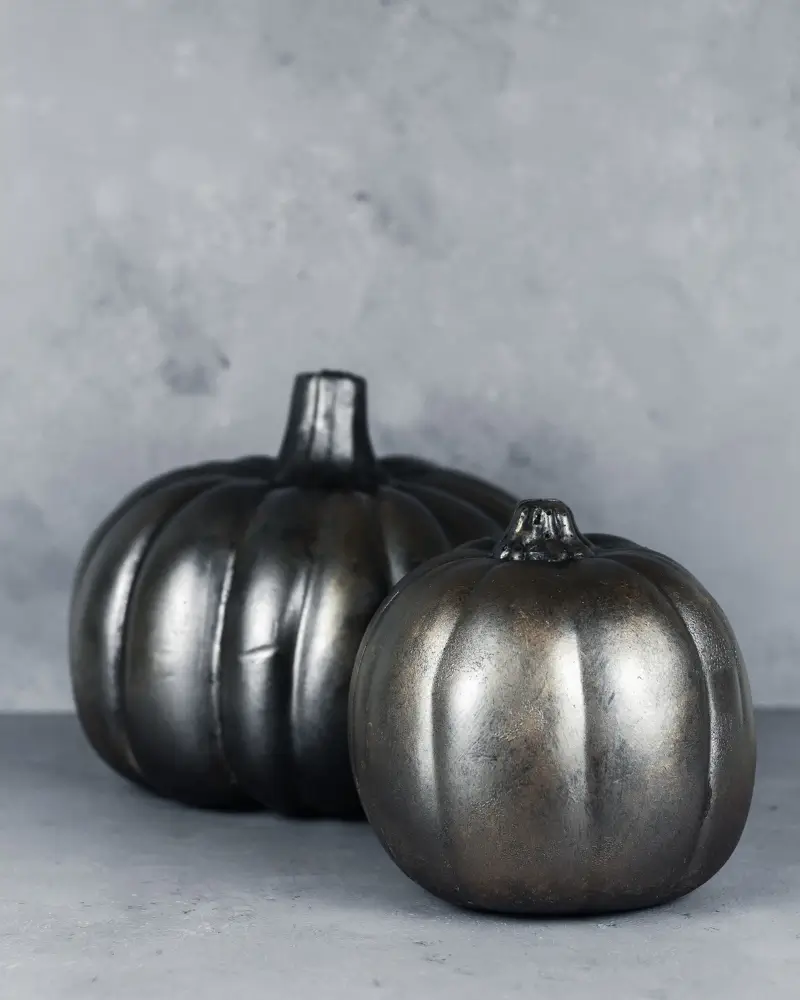
Either way, this paint technique will make your pumpkins look like galvanized metal. And you don’t have to be an artist or a cosplayer to make these. In fact, you can take this concept and apply it to any decor item in your home.
Our Design Style and Fall Decor
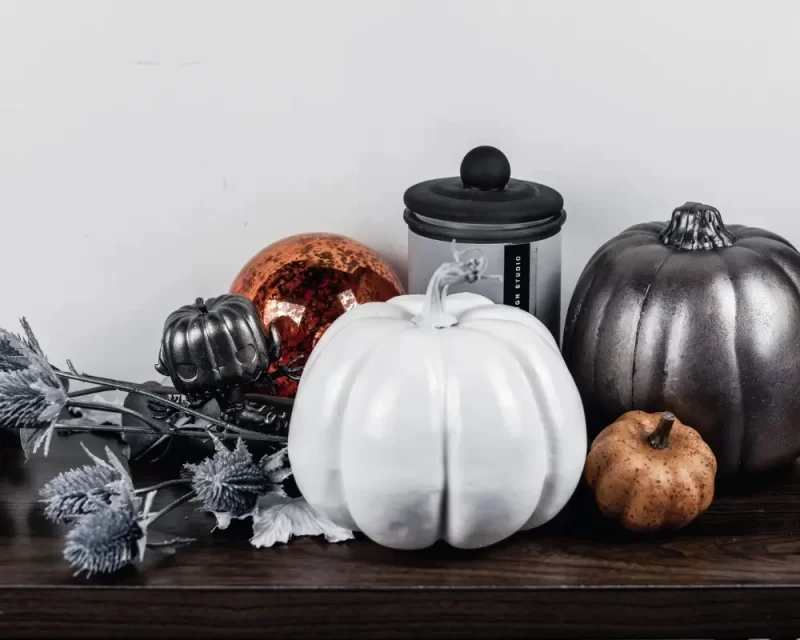
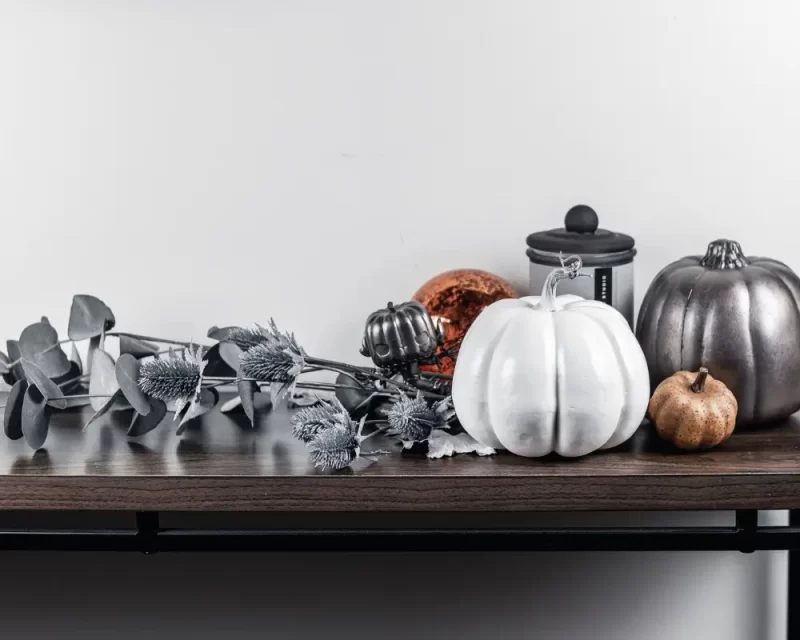
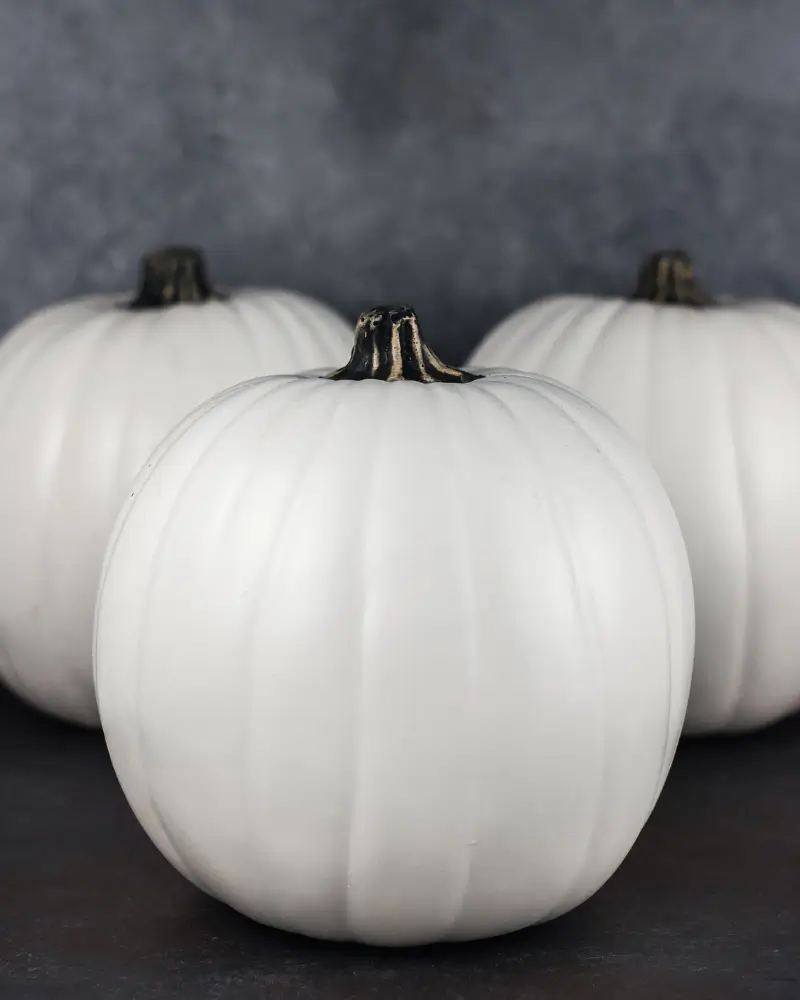
It all started a year ago with white pumpkins from Michaels. They are gorgeous, budget-friendly, and they matched both our seasonal Night Before Christmas decor, and our industrial-(geek)-chic decor style. Over the course of a year, we’ve slowly added some amazing geeky pieces to our living room. So when the fall | Halloween (I’m still calling it Falloween) season rolled around again, we thought it was time to add a bit of variety to our pumpkin collection as well.
Don’t worry, I’ll share all the details of our geeky living room decor in the new year!
Rather than go out and buy all new pumpkins (hubs talked me down off that ledge!), I decided to add new colors to the pumpkin collection. Well, technically they’re more textures than colors, but you can decide after I show you how I accomplished the texture look with a few colors and techniques.
Faux Metal Pumpkins
Full circle! Now we’re all caught up and I want to walk you through how I transformed these white pumpkins into industrial-inspired metal pumpkins with paint.
But first, a quick backstory of when hubs and I first met.
It’ll be quick, I promise!
A Distressing Story
It was a Sunday and he came to my house to hang out. Sundays are usually when I get inspired to do random things in my home, and this Sunday I was trying to make a table look like I’d owned it for years. I was obsessed with vintage and I wanted to create a vintage dining room but my current table was much too new for that. So I decided to distress it.
Hubs comes in and here I am in old clothes and my hair tied up with sanding paper and wood dust all over my clothes and floor. He sits down and watches what I’m doing. “Is that a new table?” I explain to him between sanding that it’s fairly new but doesn’t have the look I’m going for. He turns to the television and we chat a bit while I work. After a while of more sanding, he turns back to me and asks, “so you’re taking a new table and making it look old?” And as if this is completely normal, I answer, “yep.” He turns back to the television and says, “oh, okay, cool.”
Little did he know, we’d use those same techniques on some of our costumes.
Full circle, am I right?
What is distressing?
Distressing something is basically making a new thing look older by creating a wear-and-tear look using various methods and material. It requires guessing the potential look of something if it was years older than it’s current age. Paint, sandpaper, and stain are popular ways to age an object. This is a popular technique among those who love a vintage or country style in their homes.
What is weathering?
For cosplayers, distressing or weathering pieces on our costumes creates a worn and battle-aged look that makes armor and clothing look more authentic. What superhero, action figure, or post-apocalyptic zombie wears shiny new clothes and armor? So we age our cosplay using techniques with dye, paint, sandpaper, and other items to create the look of rust, grime, and appropriately-thinned clothing.
Why all the backstory? Well I wanted to give context for the methods I used to make the brand new pumpkins look like aged metal.
Like an origin story.
Don’t worry, no pumpkins were harmed in the making of this geeky home decor.
Pumpkins for (Geeky) Fall Decor
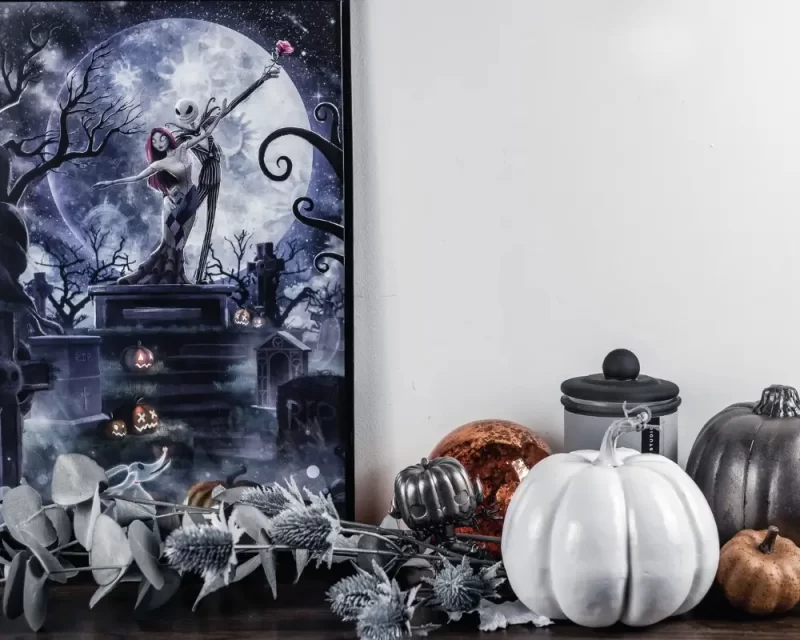
Remember when I said you could use ideas and concepts to create geeky seasonal decor? And did you see our Nightmare Before Christmas-inspired Halloween outdoor decor? So much fun! Well, we decided to transition our Halloween decor into fall (Falloween) and then right into Christmas.
So is that Falloweenmas? Fallmas? Falloweeniday? Let’s toss that in the bucket for future us to contemplate.
Since Jack Skellington is the Pumpkin King and Sally is (now) the Pumpkin Queen, and we are the geeky fans we are, we decided to transition our geeky seasonal decor right through the holidays. We kept one key common symbol of fall – the ever-popular pumpkin. Without the spice. (::snorts at her own joke::) Instead of orange pumpkins, we decided to tweak the color palette a bit to go with our subtle industrial home-vibe and the muted tones of the cult-classic movie that inspired us. That way we have the common fall denominator (pumpkins) while remaining true to our decor style and geeky preferences. That being the cult-fandom that is The Nightmare Before Christmas.
(image of color mood board)
And now that Halloween is ‘officially’ over and we’re moving into fall and then holiday decor, we switched our Nightmare Before Christmas Painted Face Pumpkins for these faux metal painted pumpkins.
You can see our full Nightmare Before Christmas-inspired decor in a future post.
DIY Industrial Faux Metal Painted Pumpkins
If you want to recreate this industrial look for your own painted pumpkins, then I can’t wait to walk you through my process. You can use this technique to create any look you want. If you just want to see how this geeky seasonal home decor looks in the end, then follow along for a play-by-play. Either way, I hope you get something out of this post!
What you will need to create your faux metal painted pumpkin
For every geeky DIY project we do in this house, we use Plaid products. This is not because we are affiliated or sponsored by the company (although I used to be a cosplay Plaid ambassador a few years ago). We love the products and how amazing they make our projects and costumes look. I never have peeling or fading and as long as you prime and seal your projects you don’t have to worry about reapplying paint.
*psst! Look over at the sidebar –> for images of the supplies and links to where you can find or purchase them. If you’re on mobile, the ‘sidebar’ will appear at the bottom of this post. A few of the links are affiliate links and whenever you click a link and hit that purchase button, I receive a small amount to help with maintaining this blog. I am truly grateful to you! Not every link is affiliated, but if I use it and love it, I want to share it with you, either way. You can read more about my affiliate disclaimer, here.
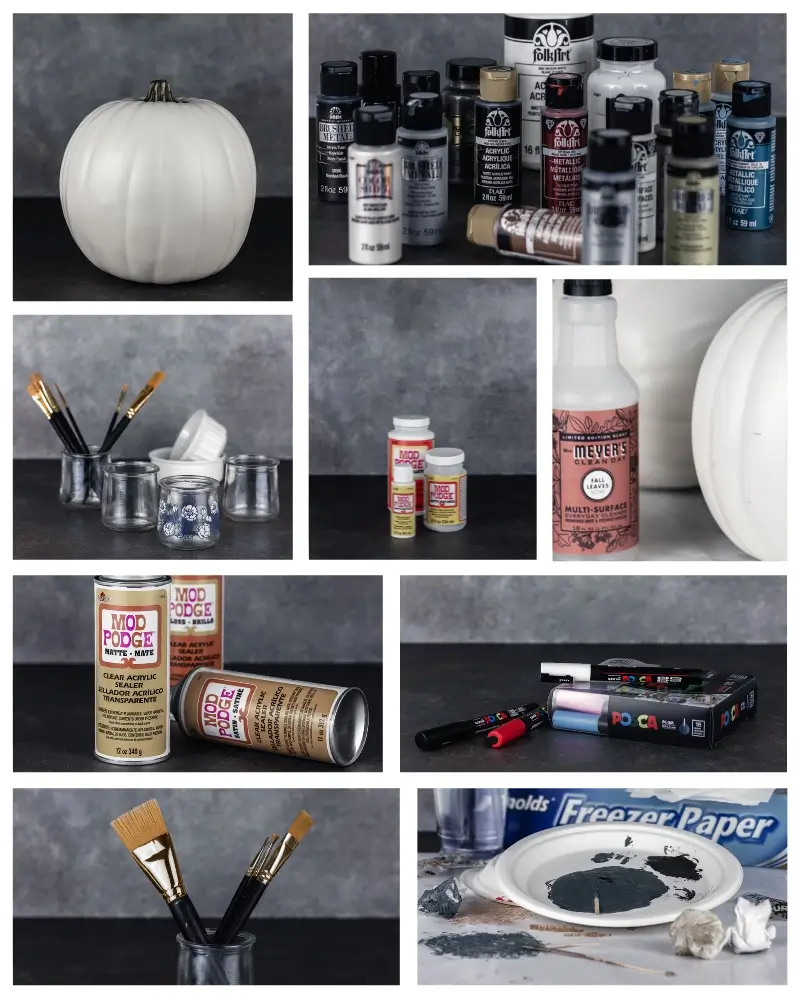
Mod Podge Cream, matte (for priming)
Craft brushes
Folkart Paints
Mod Podge Spray (for sealing)
Other materials
White Pumpkins, Michaels Stores
Matte Spray Paint
Sponge (optional)
Paper Towels
Glass Jars or containers to hold water
Gloves (also optional)
The Nightmare Before Christmas Spotify Soundtrack (a must-have for mood music)
How to create your diy faux metal painted pumpkins
Prepare your painting area by covering surfaces and furniture you don’t want painted. This is not a messy project (unless you use spray paint) but if you’re painting on a favorite table or near your favorite cozy chair, be mindful that paint can splatter and that acrylic paint is hard to come off.
Prime your pumpkin
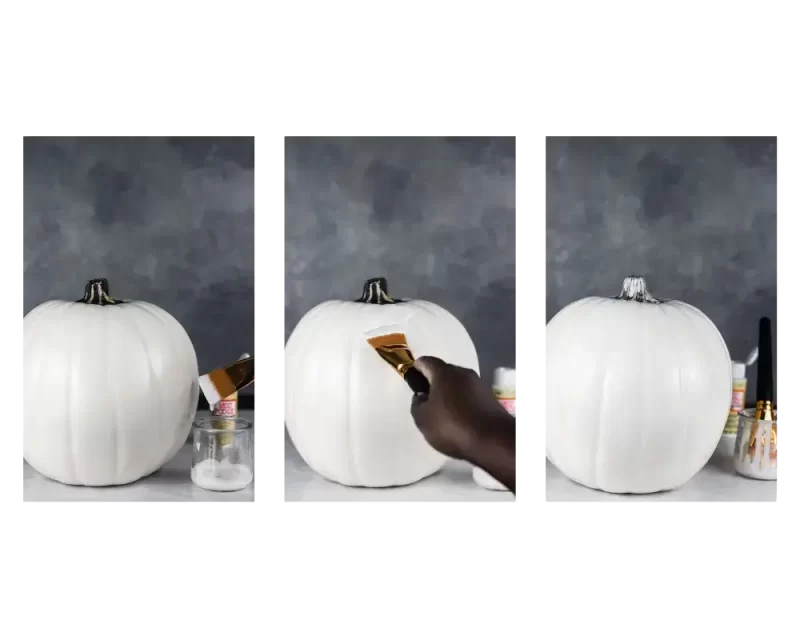
I use Mod Podge to prime surfaces before painting them. This ensures smooth paint application and just a nice overall finish. It allows me to use less paint, as well. Let it dry completely before moving on to the next step.
Apply the base coat
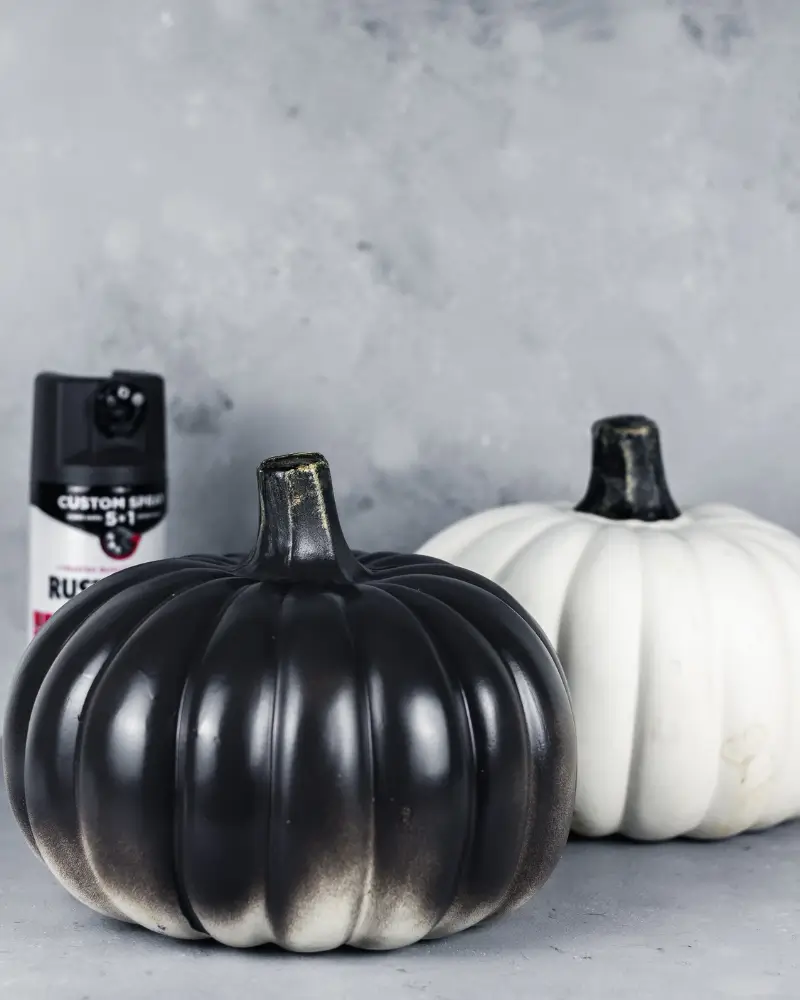

You can either use spray paint or acrylic. This really depends on the size of your project and personal preference. I really love the act of applying paint. But if I’m in a time crunch I will use spray paint.
I don’t really have a preference – just haven’t found one I absolutely love yet. So if you have a favorite, please share it below so I can try it out!
I used both methods for these pumpkins and found that the spray paint took a bit longer to dry in the humidity outside. But the finish was nice and smooth. Hand painting the base coat also dried smooth, but would show slight imperfections if you touched it while painting.
Let your base coat dry before moving on. Of course, if this is all you want to do then you can stop here and skip to sealing your pumpkin. If not, let’s get to the good part.
Distressing your pumpkin
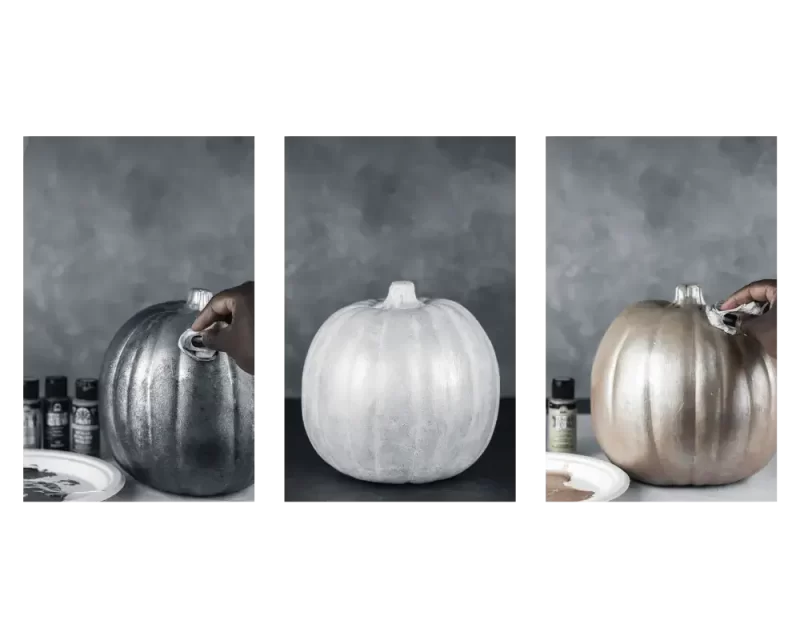
There is something about distressing a project that makes me feel complete. I know, weird, but I love the detail work that gives something character. And that’s what we’re doing when we’re distressing these pumpkins.
The whole point is to make them look like metal, so you can do that however you feel will get the job done. For me, a dry rolled up paper towel sheet dipped in two or more colors combined and dabbed or stippled over the surface is the perfect method. I don’t completely mix the colors, rather I like the look of one color showing up better than others. Less like a pattern and more like a random happy accident.
I press the paper towel all over the surface of the pumpkin until the entire pumpkin has the textured look I’m going for. I find the dry paper towel to be easier, although you can use a sponge or dry brush to get a similar look. Then I add subtle pops of more colors, but only if I think it’s needed. Honestly, I’m usually good with one coat of texture. And that’s it.
Seal your faux metal painted pumpkin
Use the Mod Podge spray to seal your work and let it dry completely.
Decorate with your new DIY faux metal painted pumpkins
You’re all done! Now you can use your pumpkins in your decor and reuse them year after year.
Let me know if you use this method for your pumpkins and please share how they turned out! I’d love to see how you use your faux metal | DIY galvanized pumpkins in your own geeky home decor.
No Comments